⭐️ E-ink
⭐️ Kindle Editor's Pick


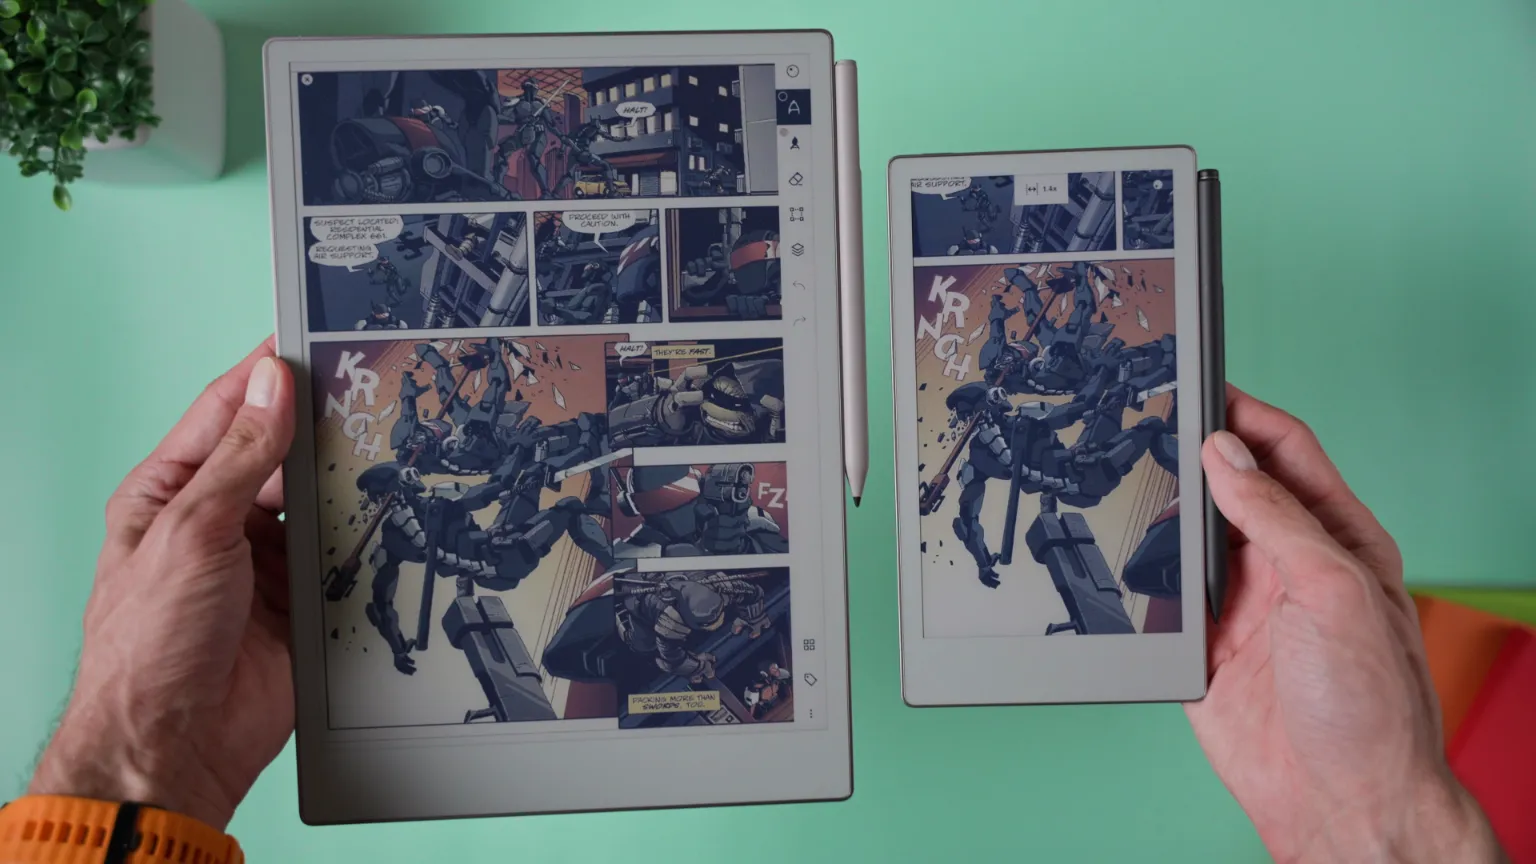
13 Tips and Tricks for the reMarkable Paper Pro Move
13 Tips and Tricks for the reMarkable Paper Pro Move
10 minutes read time.
If you’ve just picked up the new reMarkable Paper Pro Move, you’re probably wondering how to get the most out of it. Well, you’re in the right place. Today I’m sharing 13 tips and tricks that will take your reMarkable experience to the next level.

The best part? These tips work not just on the Move, but also on the Paper Pro, since both devices share the same software.
It doesn’t matter if this is your first reMarkable or if you already use the Paper Pro and picked up the Move as a smaller, more portable addition — there’s something here for everyone.
Whether you’re taking notes, sketching, organising ideas, or even reading, there are plenty of clever ways to get more out of your device.
🔷 TIP 1: Enable Light Sleep to Lock the Display
This is such a handy feature if you want to keep something important visible all day while using almost no battery.
To set it up, head to Settings → General Settings → Battery, then enable Standby and set it to five minutes. After that, go to Display and switch on the Visible Content option.
Once that’s done, the page you leave open — like your daily planner, to-do list, or calendar — will stay frozen on the screen even when your device goes into light sleep.
It’s a small tweak that makes your reMarkable feel even more like a real paper desk companion.
🔷 TIP 2: Use the “Select Below” Gesture
This gesture is a huge time-saver when you want to grab big chunks of notes in one go.
Here’s how it works: in any notebook, choose the Selection Tool and draw a straight horizontal line. Keep your pen pressed on the screen, and a small “Select Below” button will pop up. Tap it, and everything beneath that line will be selected automatically.
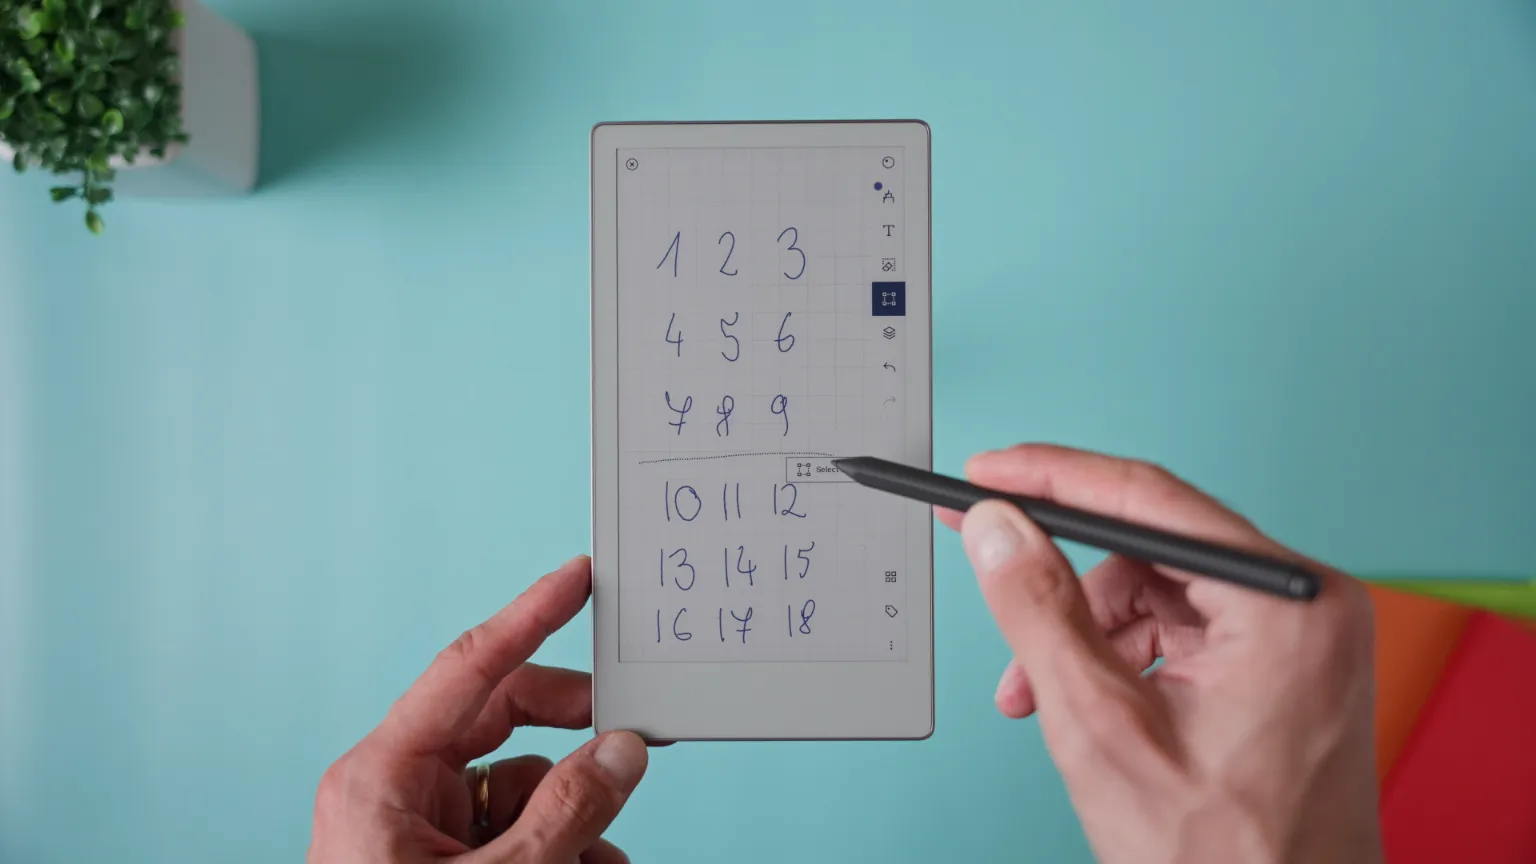
It’s incredibly useful if you divide your pages with lines or need to move or format large sections of notes. No more selecting things one by one — just one smooth move and you’re done.
🔷 TIP 3: Snap Lines and Shapes to Perfection
You don’t need perfect handwriting or drawing skills to make your pages look clean and precise.
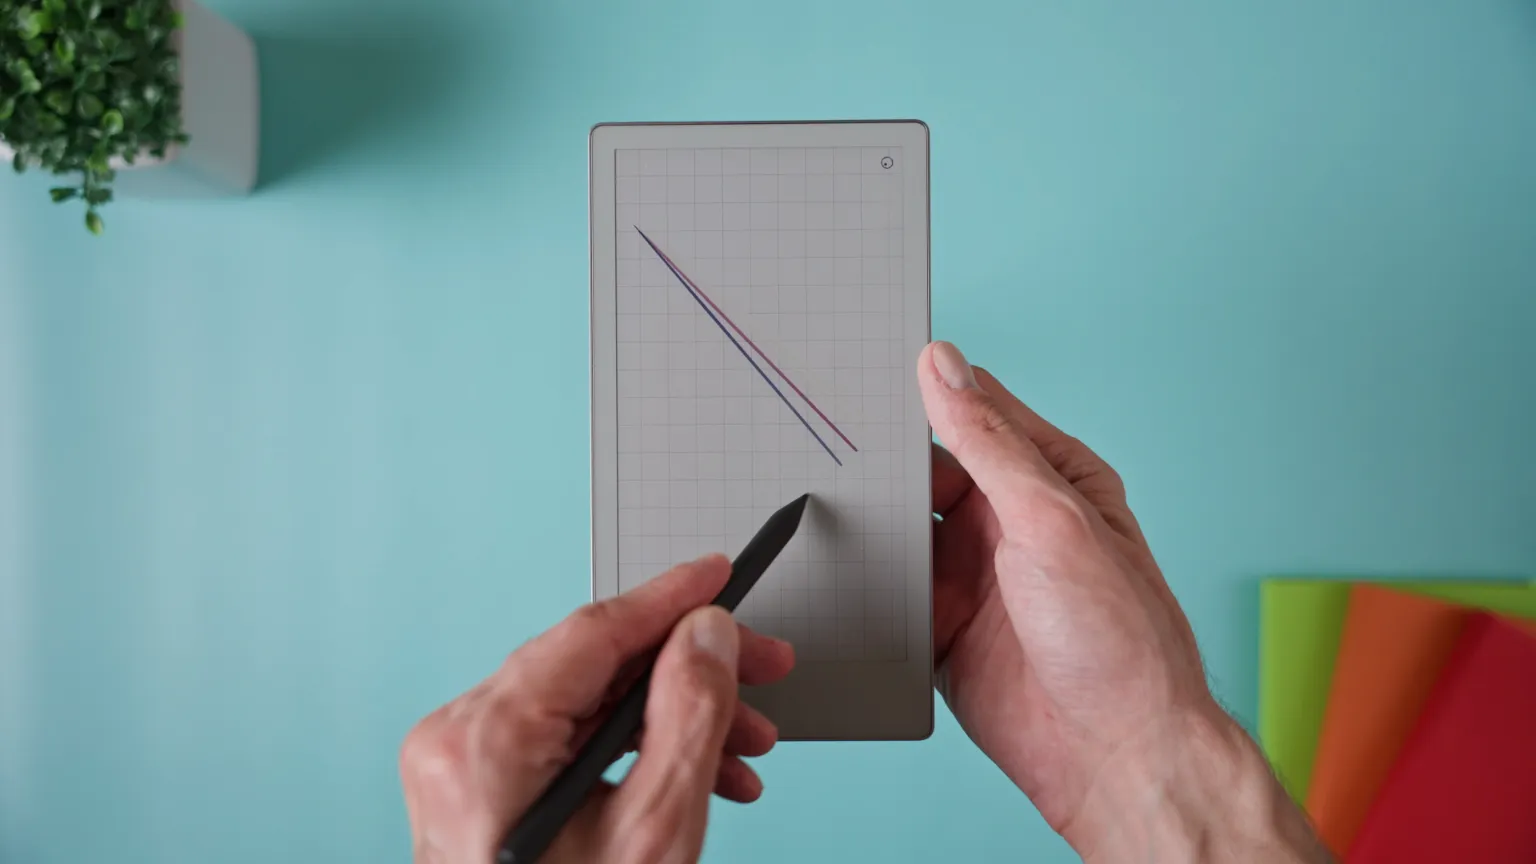
If you draw a line by hand and hold the pen tip still at the end, the reMarkable automatically straightens it for you. You can then drag the endpoint to adjust its length or angle.
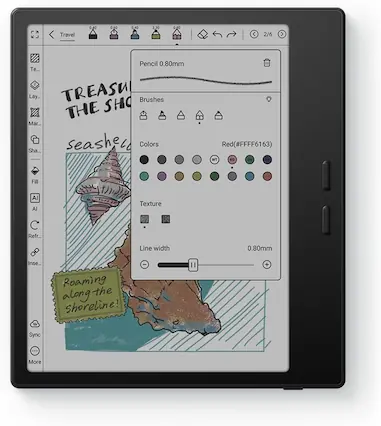
This trick also works for shapes — just make sure you’ve got Shapes enabled. Draw a circle, square, rectangle, or triangle, then hold the pen at the end. The shape will instantly clean itself up, and you can resize or rotate it as needed.
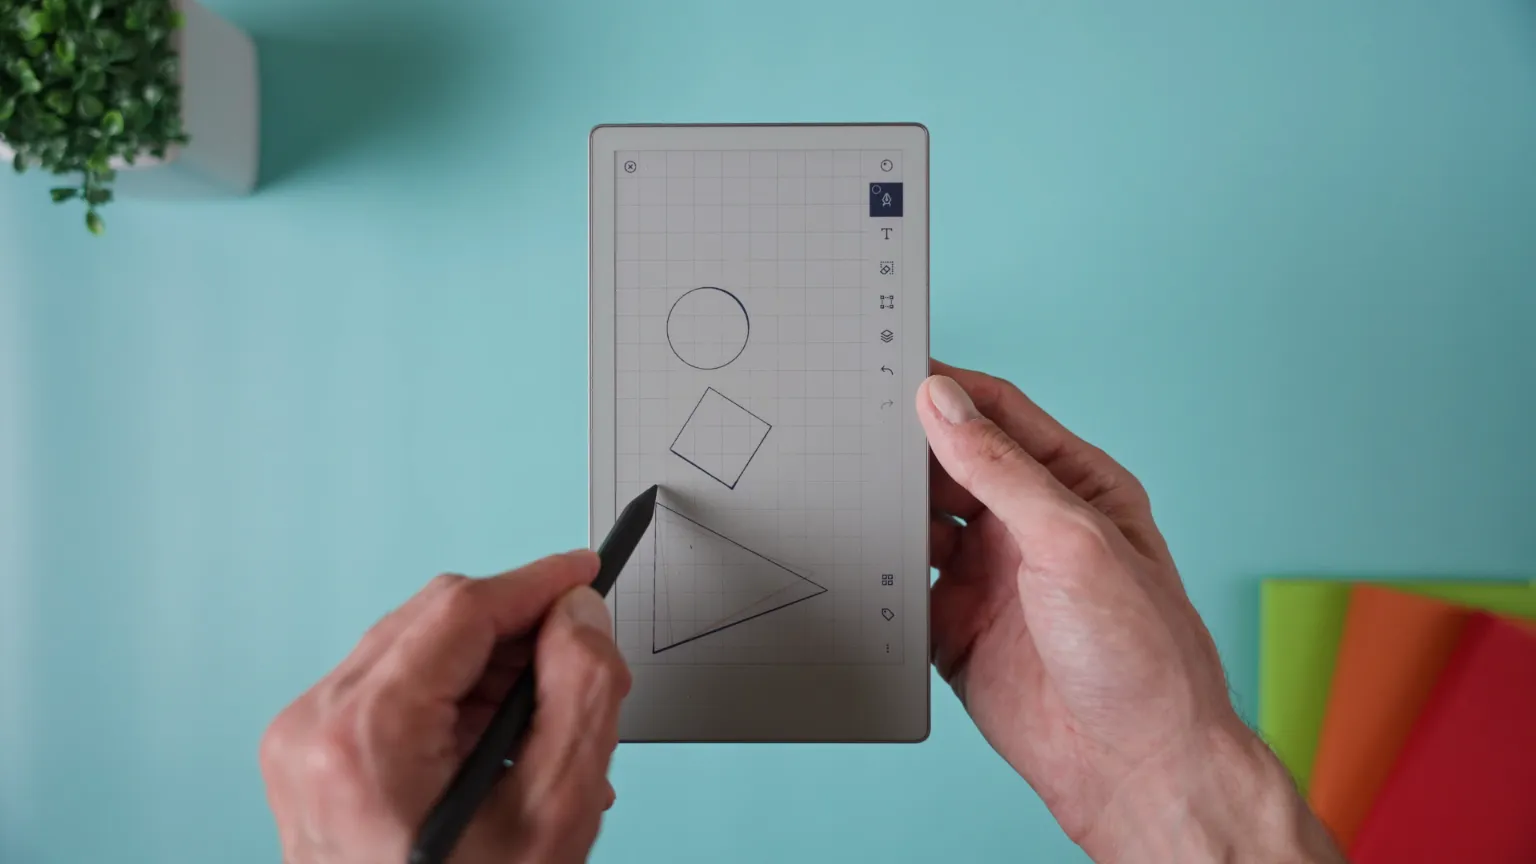
Perfect for when you want your diagrams or layouts to look crisp and organised.
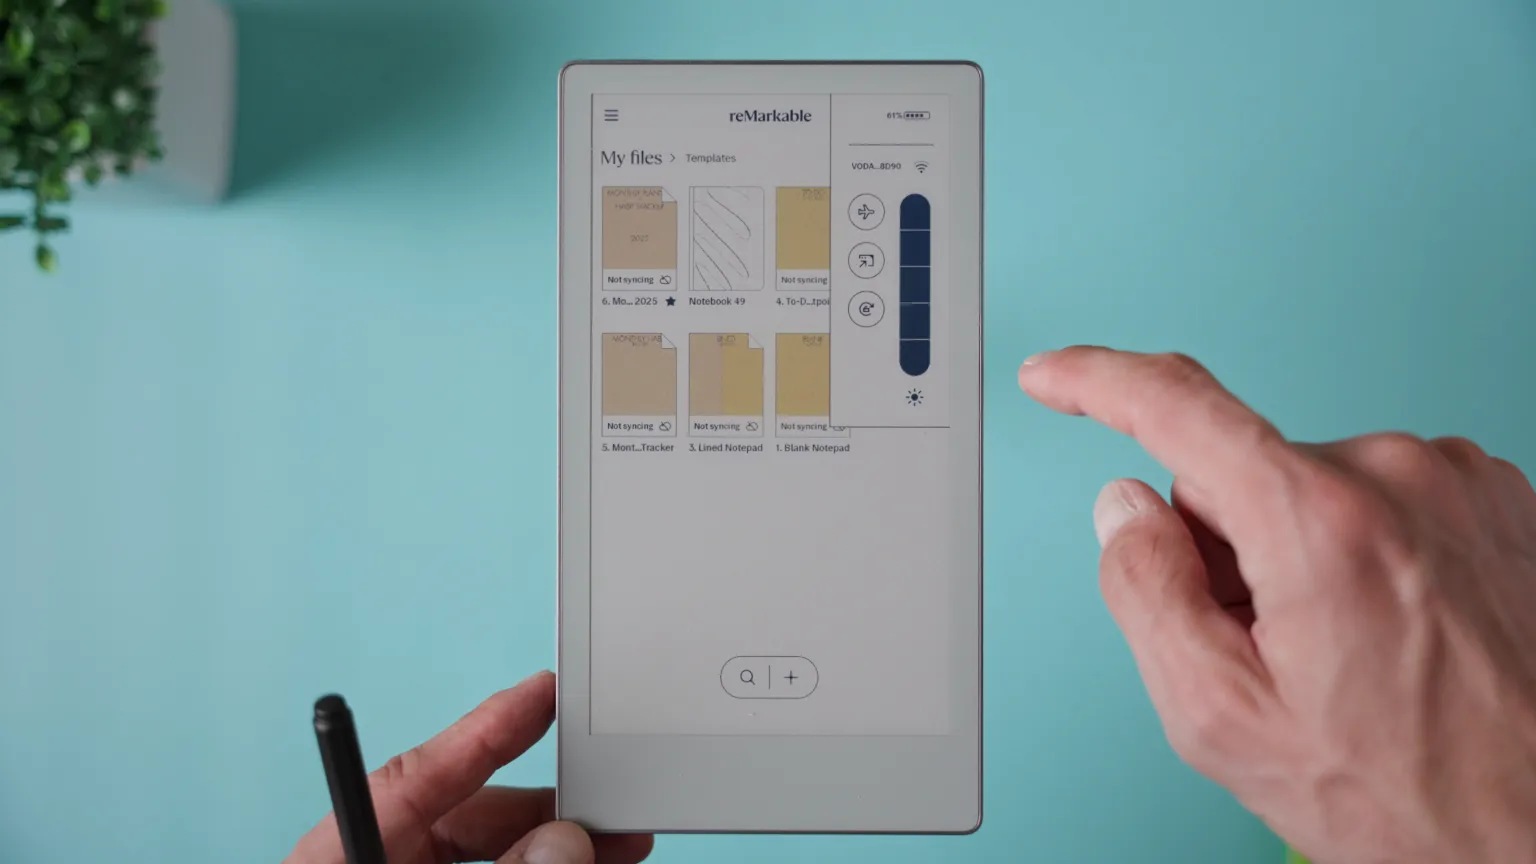
🔷 TIP 4: Number Your Folders for Custom Order
By default, folders on reMarkable are sorted alphabetically — which isn’t always ideal if you want a custom order.
A simple fix is to add numbers or letters at the start of each folder name. For example:
-
1 Work -
2 Personal -
3 Notes
This ensures they’ll always appear in that exact order, no matter what.
It’s a small organisational trick that makes your workspace feel much more intentional and structured.
🔷 TIP 5: Insert Templated Note Pages into PDFs
This one is a total game-changer if you like taking notes directly inside your reading materials.
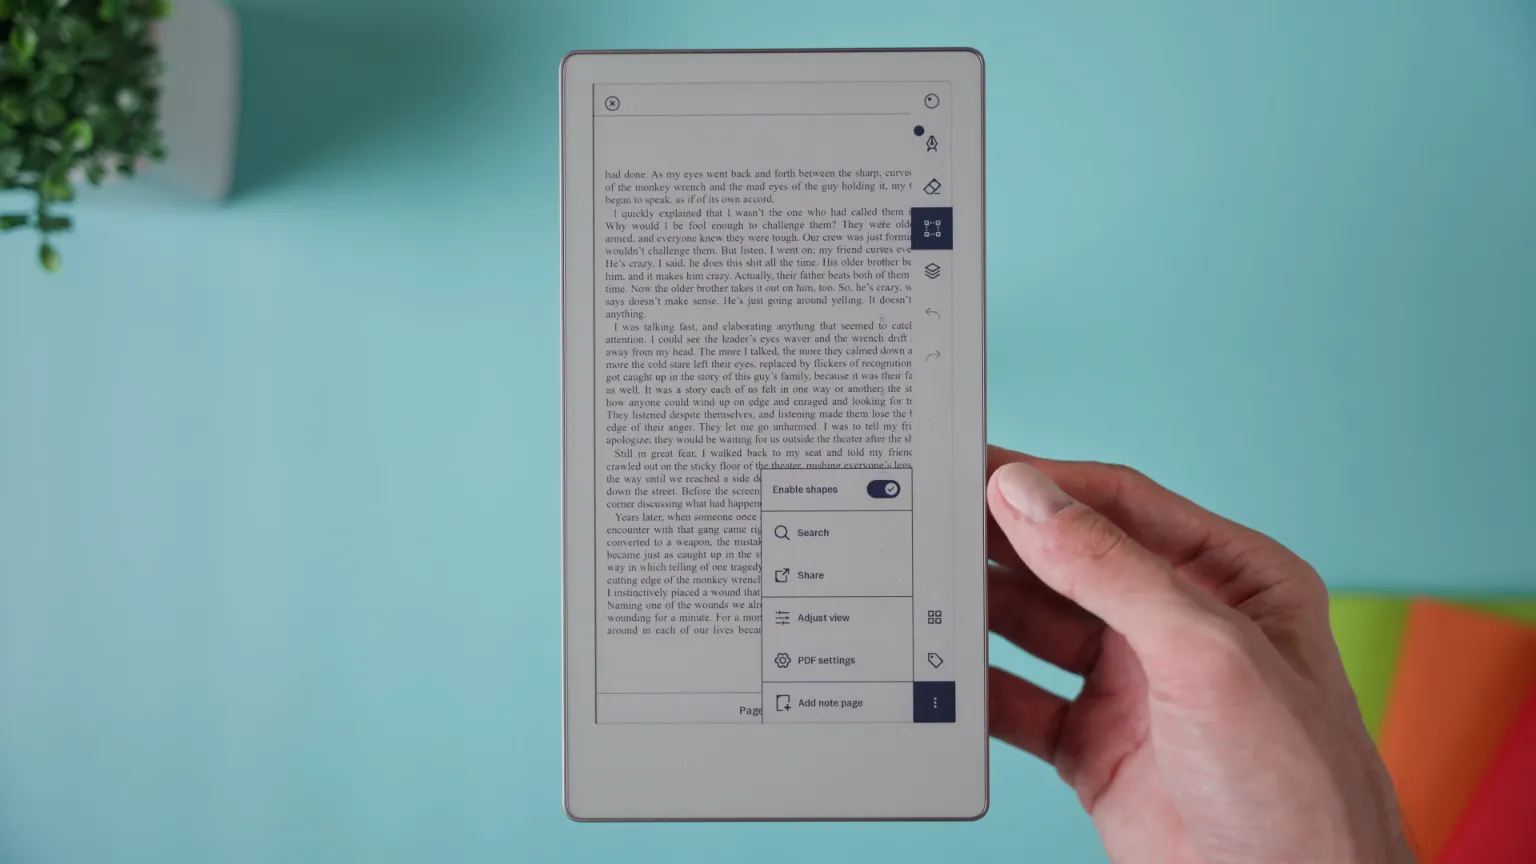
While reading a PDF or eBook, you can actually insert a templated blank page right in the document. To do it, tap the gear icon in the document settings and choose “Add note page.” Then pick any of the built-in templates — like grid, lined paper, kanban board, or even music staff.
Your new page will appear exactly where you are in the PDF, letting you take notes or sketch ideas without ever leaving the document. It’s the perfect way to keep your reading and note-taking together in one neat place.
🔷 TIP 6: Manually Adjust PDF Contrast
Not all PDFs are created equal — some look pale or washed out on e-ink screens, especially scans or files with dark backgrounds.
Luckily, there’s an easy fix. While viewing a PDF, open the document settings and use the contrast filter slider to fine-tune how the page looks. Move it until the text and images appear sharper and easier to read.
You can also switch between Normal, Text, Graphic, and Photo modes depending on what suits the file best. This small tweak makes a huge difference when working with older scans, low-contrast documents, or files that just don’t display well out of the box.
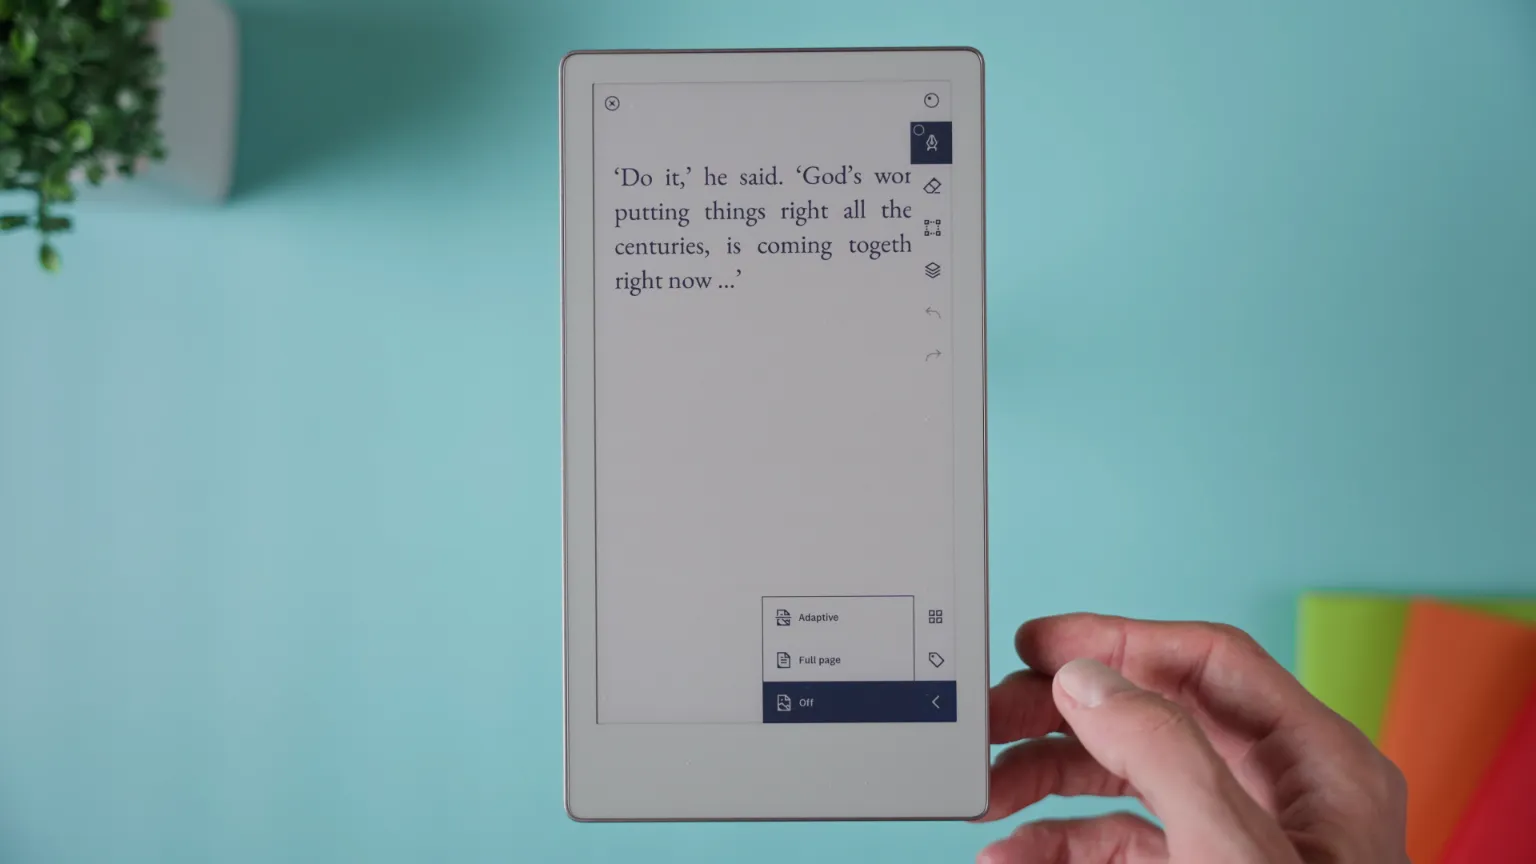
🔷 TIP 7: Adjust Column Width for Typed Text
If you ever felt limited by the narrow typing area in your notes, this one’s for you.
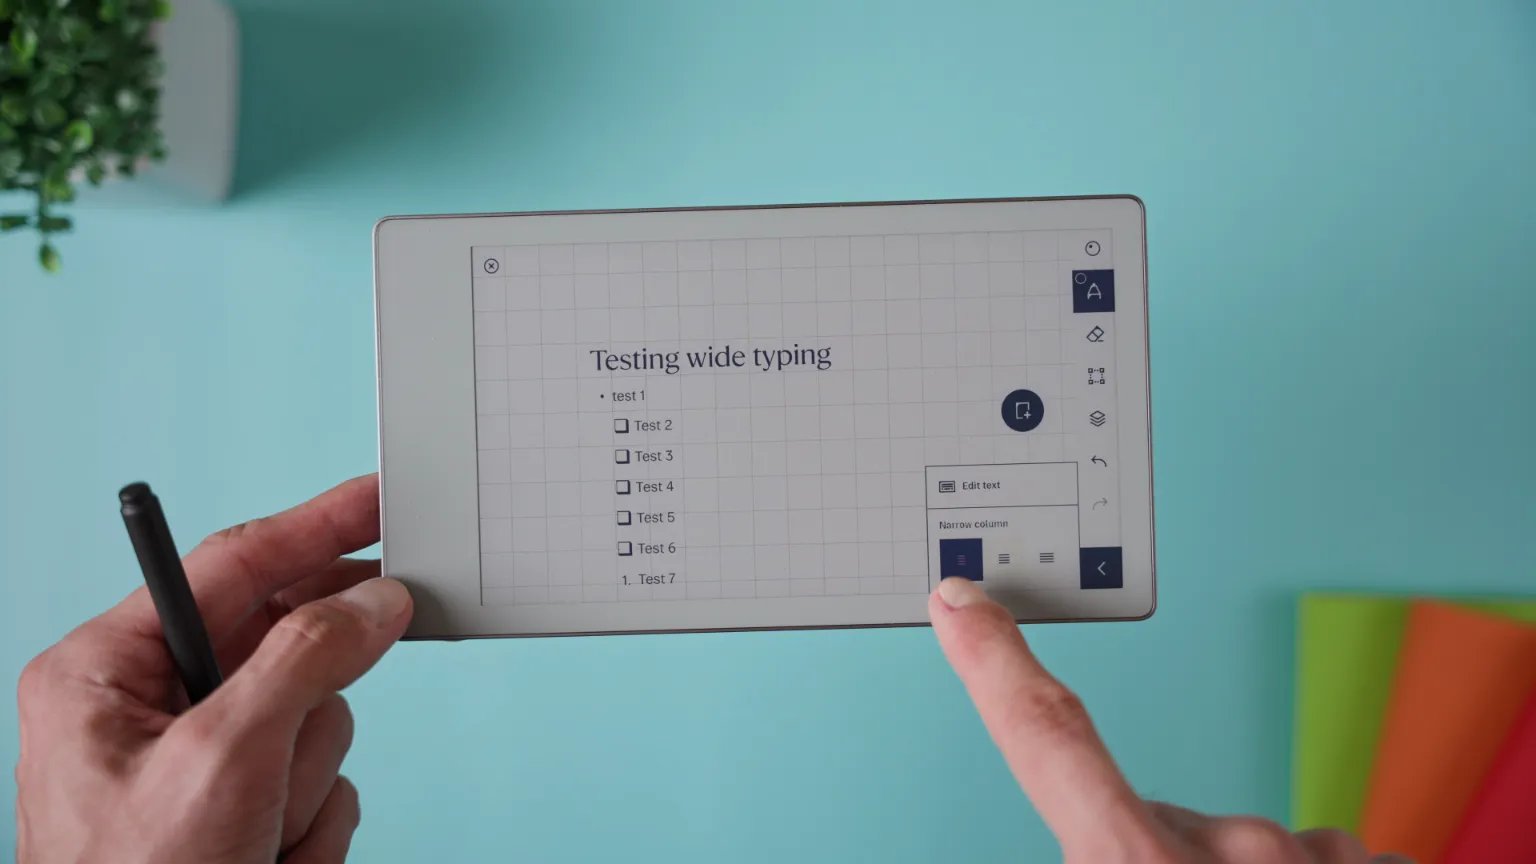
By default, when you use the Text Tool, the column for typing is quite narrow. To expand it, tap Text in the toolbar and switch to “Wide column.” This stretches your text area across more of the page — perfect if you’re typing longer notes, journaling, or working in landscape mode.
And if you prefer leaving extra space for handwritten notes or drawings in the margins, you can always switch back to Narrow column anytime.
🔷 TIP 8: Select Typed Text with Taps and Holds
Working with typed text on reMarkable is smoother than ever thanks to a few clever gestures.
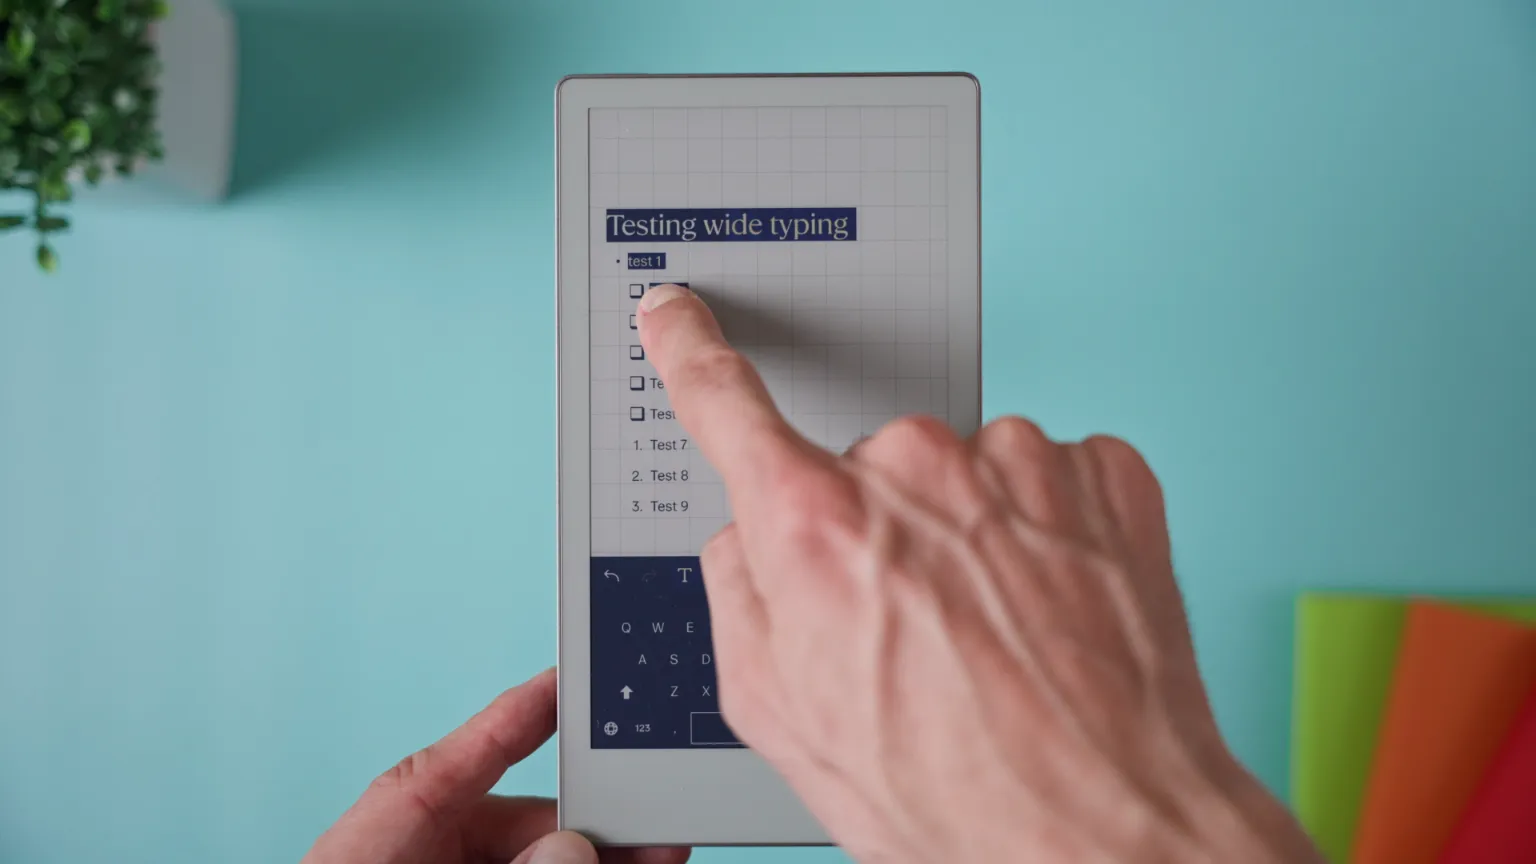
First, switch to the Selection Tool and tap twice on any text to enter typing mode. From there:
-
Double tap a word to highlight it.
-
Tap and hold, then drag to select multiple words or full paragraphs.
-
Triple tap to highlight an entire line.
-
Four taps will select all the text in that area.
Once your text is selected, you can cut, copy, or format it just like on a regular document editor.
And here’s a nice bonus: with the latest software update, you can now add checkboxes that toggle on and off — perfect for to-do lists, planners, and habit trackers.
🔷 TIP 9: Tap Hyperlinks in PDFs with Your Finger
If you use digital planners or PDFs with clickable sections, this one’s essential.
Whenever a PDF contains hyperlinks — like a table of contents, chapter links, or internal planner buttons — you can tap them with your finger to jump straight to the linked page.
It’s important to use your finger, not the pen, since tapping with the stylus will simply draw instead of opening the link.
This trick works beautifully with hyperlinked templates, planners, or even custom notebooks.
And by the way, I’ve created some free hyperlinked templates for reMarkable that also work perfectly on the Move — including weekly planners, habit trackers, and dotted pages. You can grab them through the link in the description if you want to try them out.
🔷 TIP 10: Favorite Files for Quick Access
If you often return to the same notebooks or documents, marking them as Favorites will save you a ton of time.

Just star any important file, and it’ll show up in your Favorites list. Then, whenever you need to reach it quickly, simply swipe down from the top of the screen with two fingers to open the Recents and Favorites drawer.
Your starred items will appear right at the top, ready to open with one quick tap — no need to dig through folder structures every time.
🔷 TIP 11: Choose a Shorter or Longer Passcode
If you want to control how secure — or how fast — your unlock process is, you can easily adjust your passcode length.
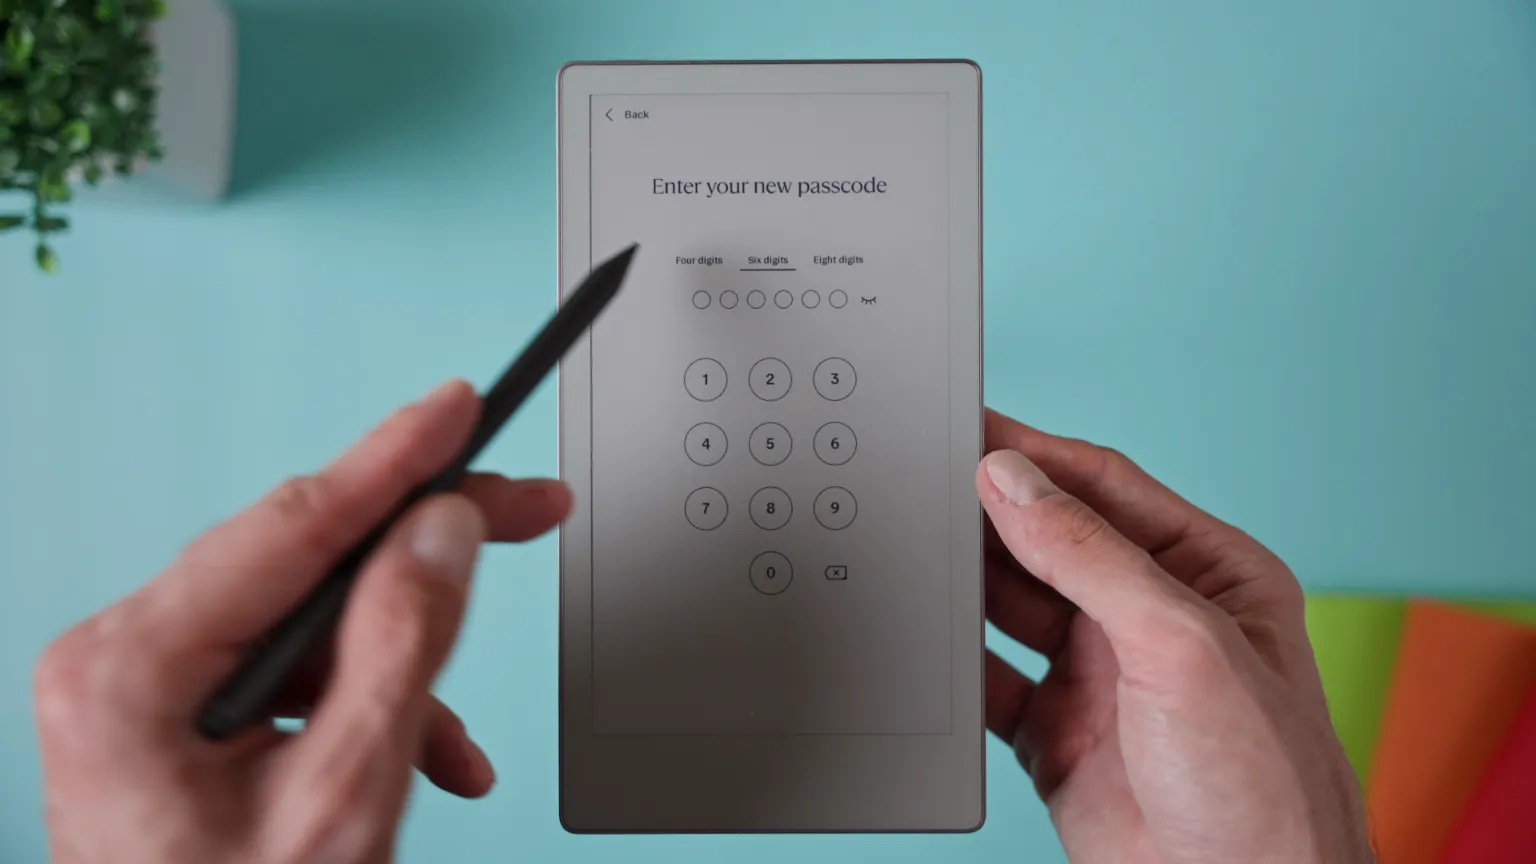
Go to Settings → Security, and you’ll see options for a 4, 6, or 8-digit PIN.
-
4 digits unlocks your device the fastest.
-
8 digits adds the most protection.
-
6 digits is a nice middle ground — still quick, but with extra peace of mind.
Your passcode secures everything on your device, including notes, sketches, and private documents. So if privacy matters to you, choosing a longer PIN is worth it.
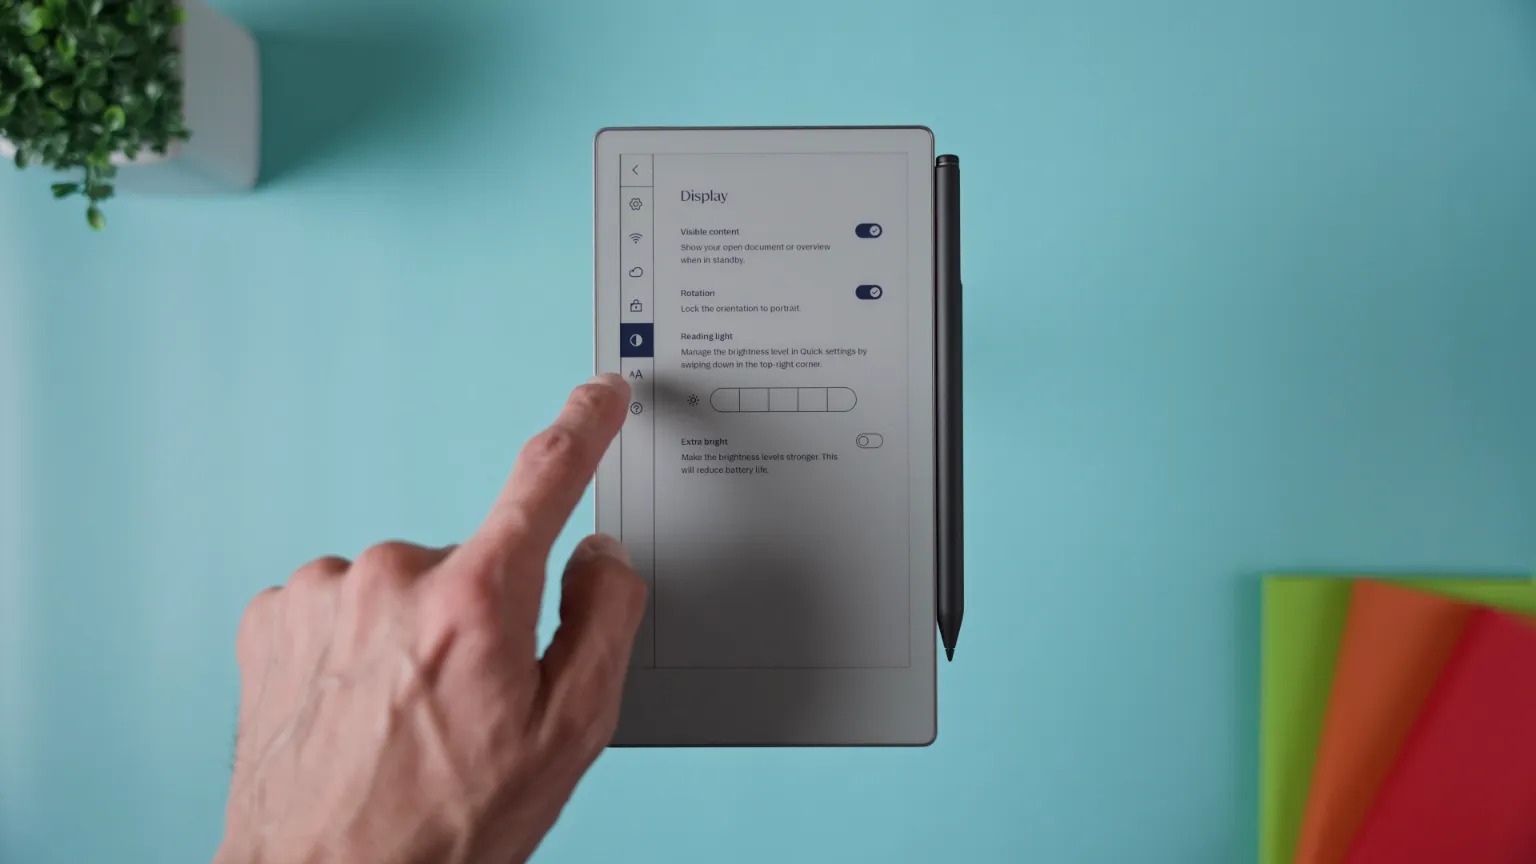
🔷 TIP 12: Adjust the Reading Light with Quick Settings
This one’s perfect for night readers or low-light situations.
To change the front-light brightness, open the Quick Settings menu by tapping the battery icon or swiping down from the upper-right corner. You’ll see a slider to adjust brightness instantly.
Keep it bright for clear visibility, or dim it to save battery life. There’s also an Extra Bright option for when you need maximum light.
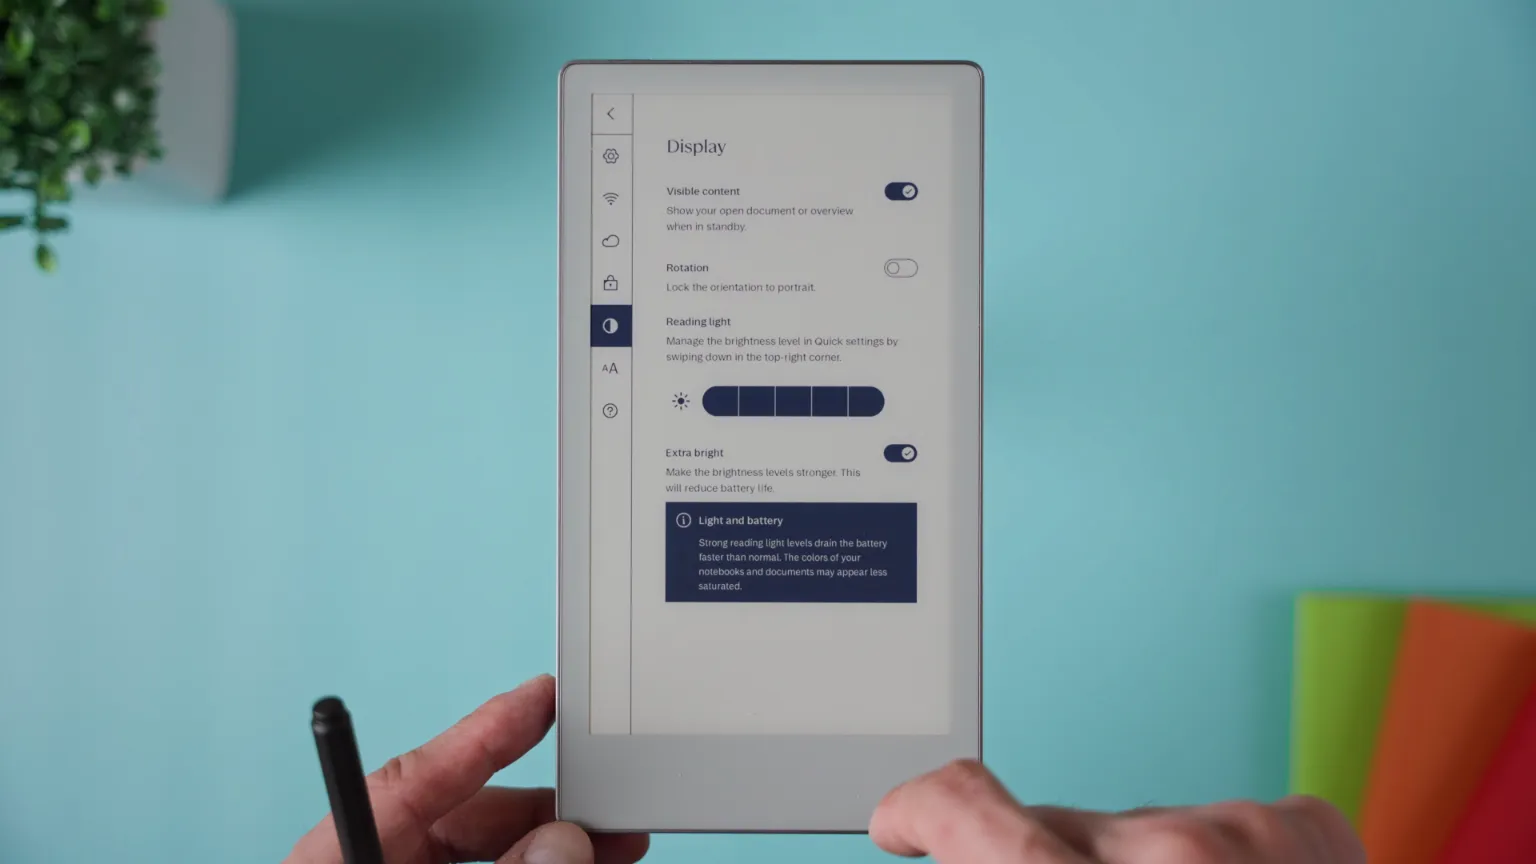
To turn that on quickly, press and hold the brightness icon in the Quick Settings menu. That opens the Display Settings, where you can enable Extra Bright mode.
Simple and practical, especially if you use your device in different lighting conditions throughout the day.
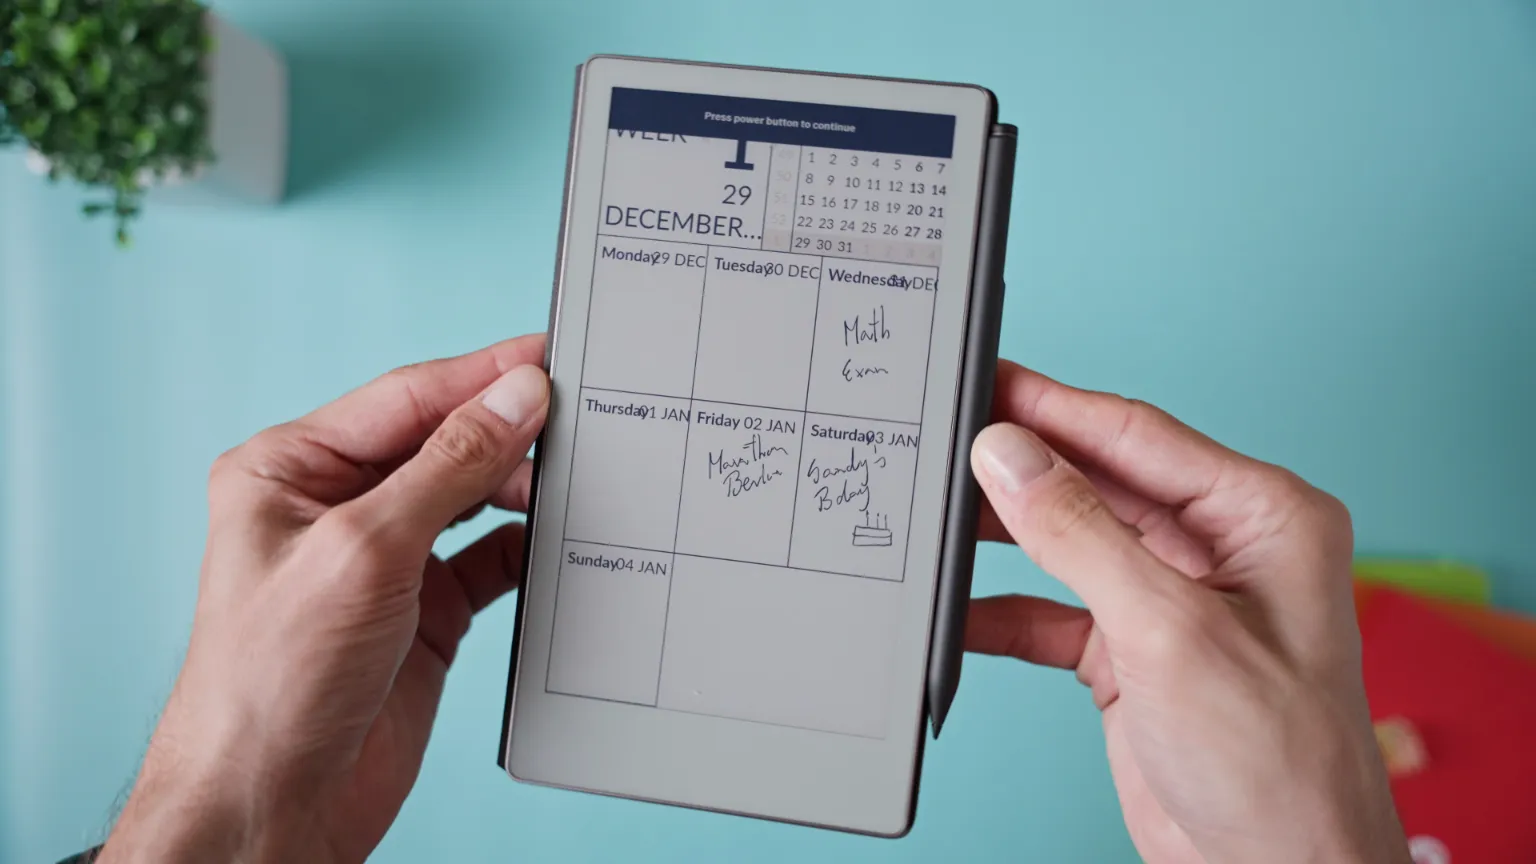
🔷 TIP 13: Create Custom Calendars with ReCalendar
This last one’s a gem for anyone who loves organisation.
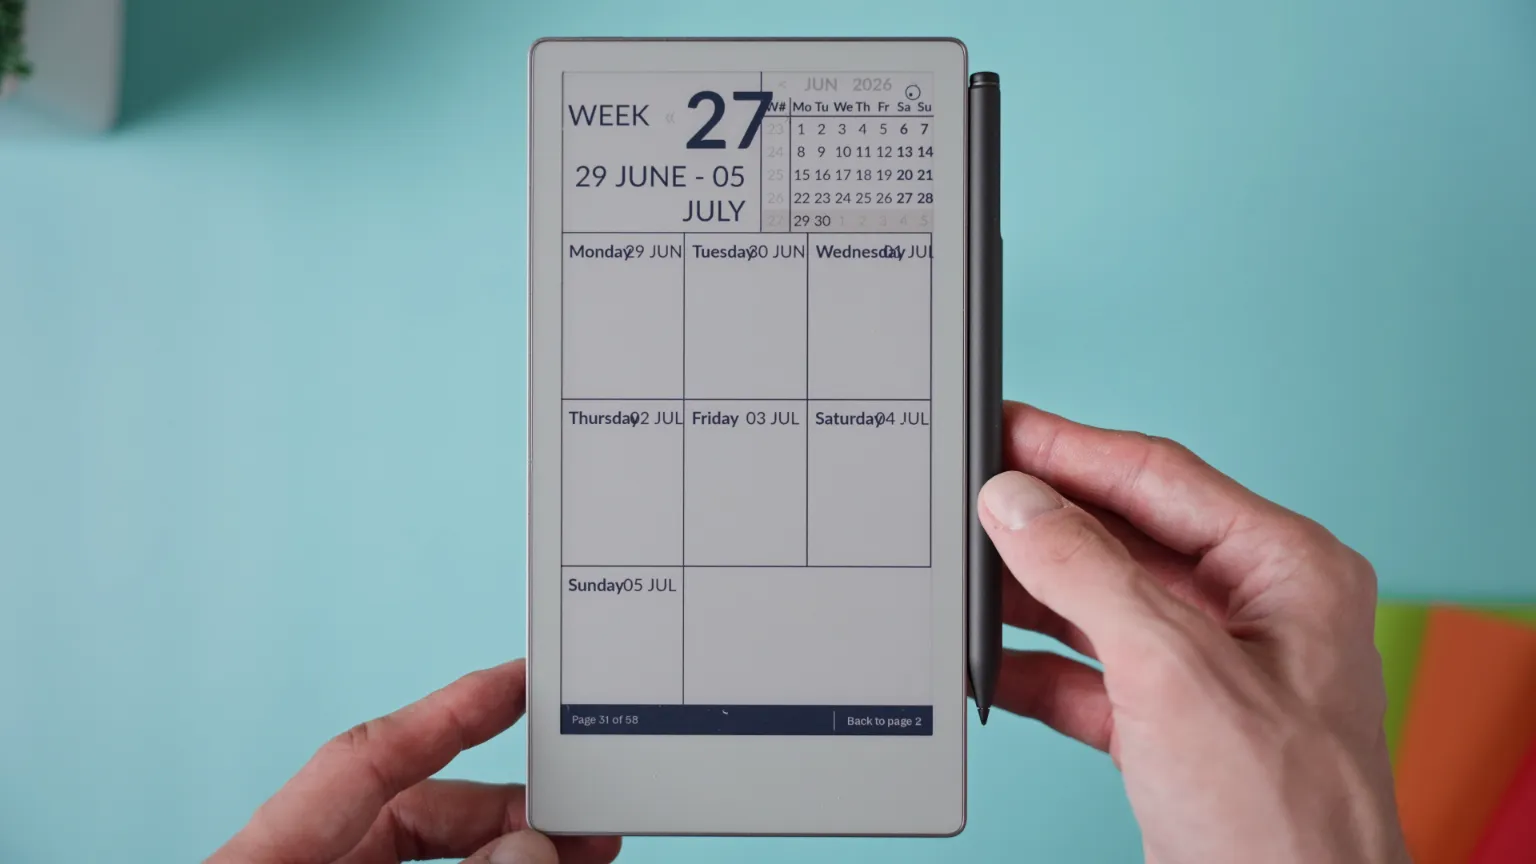
ReCalendar is a free, open-source calendar generator for reMarkable tablets. It lets you design your own custom calendars right in your browser, then download them as PDFs to upload directly to your device.
I discovered it a few months ago — and while I’m not affiliated with the creator, Igor Klimer, I think it’s a brilliant tool. You can make personalised calendars with hyperlinks, tweak layouts, and it’s completely free.
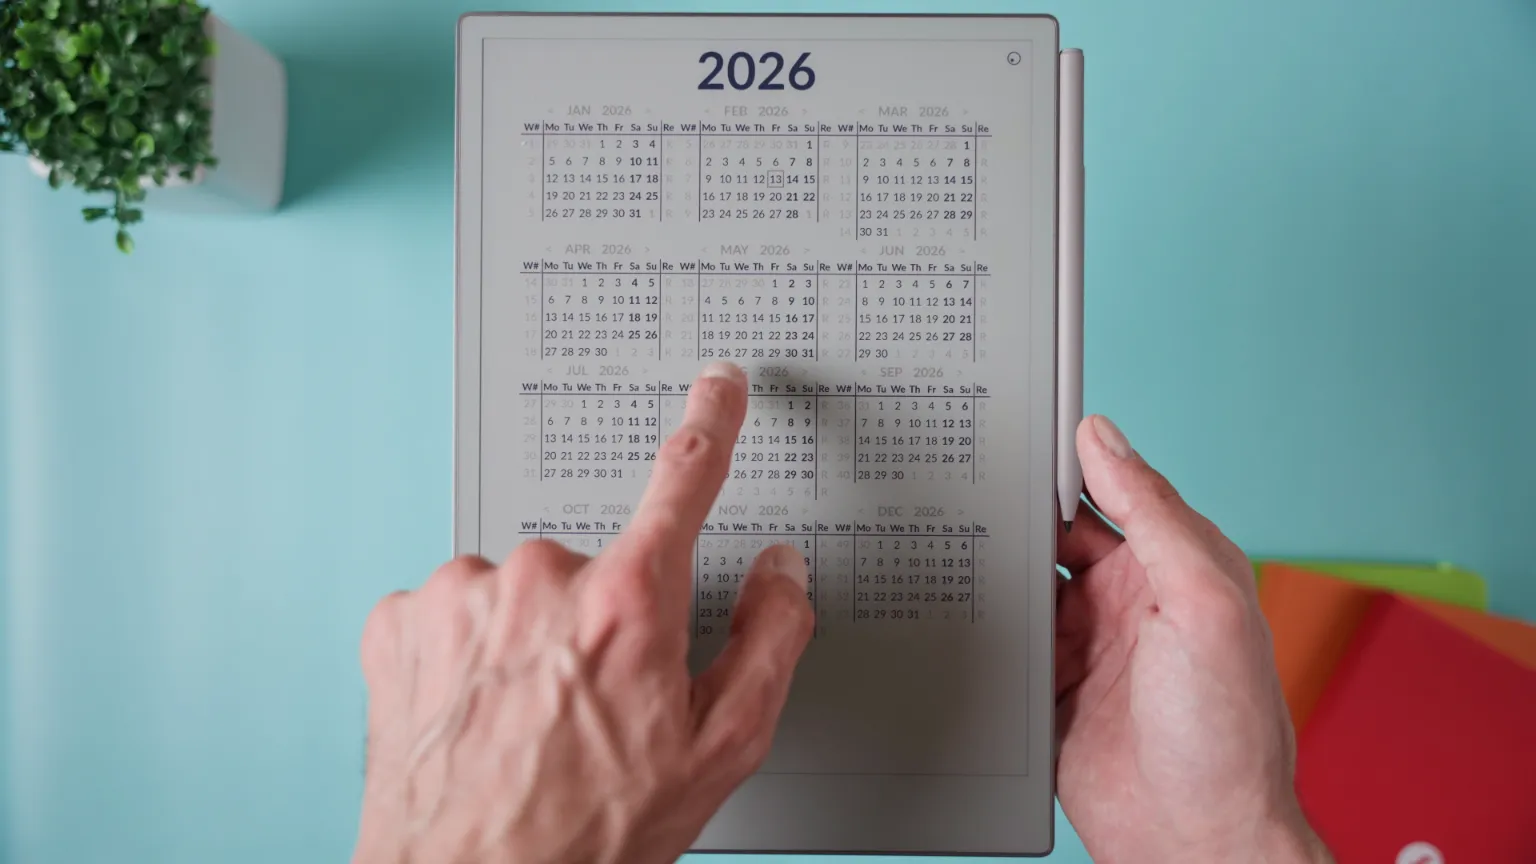
It works especially well on larger screens like the Paper Pro or reMarkable 2, but you can also set a custom resolution and DPI for the Move, and it displays beautifully.
It might take a few minutes to fine-tune, but once you’re done, you’ll have a fully custom calendar that fits your workflow perfectly. You can find the link HERE.
🔷Final Thoughts
The reMarkable Paper Pro Move is an incredible tool for staying organised, creative, and focused — but it really shines once you start exploring features like these.
Whether it’s gestures, templates, or little interface tricks, each of these tips helps you use your device more efficiently and make it feel uniquely yours.
If you’ve discovered any clever tricks of your own, share them in the comments — I’d love to hear what’s working for you.
🛒 Thinking of getting REMARKABLE PAPER PRO MOVE?
► AMAZON US 🇺🇸: https://amzn.to/4nKjXcC
► AMAZON EU 🇬🇧🇪🇺: https://amzn.to/4nHkcVH
► REMARKABLE STORE: https://remarkable.com/products/remarkable-paper/pro-move
🔗 LINKS
► Download my FREE reMarkable templates: https://howtotechstuff.com/free-download-5-templates-for-remarkable-paper-pro/
► Recalendar.me for FREE personalized calendar PDF: https://recalendar.me/
I enjoy creating educational and how-to videos on the latest gadgets and electronics, from phones to e-book readers and everything in between. My goal is to help you get the most out of your devices with easy-to-follow guides and in-depth reviews.
FULL ARTICLE ABOVE BUT…
THIS VIDEO COVERS THIS!
OTHER VIDEOS…